SpringBoot详解2:Web开发
引言
接下来,我们开始学习Spring Boot的Web开发,从这一章往后,就属于我们实战部分的内容了。
其实Spring Boot的东西用起来非常简单,因为Spring Boot最大的特点就是自动装配。
使用Spring Boot的步骤:
1、创建一个Spring Boot应用,选择我们需要的模块,Spring Boot就会默认将我们的需要的模块自动配置好
2、手动在配置文件中配置部分配置项目就可以运行起来了。
3、专注编写业务代码,不需要考虑以前那样一大堆的配置了。
要熟悉掌握开发,之前学习的自动配置原理一定要搞明白!
比如:Spring Boot到底帮我们配置了什么?我们能不能修改?我们能修改哪些配置?我们能不能扩展?
- **自动配置类(
xxxAutoconfiguration):**向容器中自动配置组件(Bean)。 - 属性配置类(
xxxProperties):封装(properties或yaml)配置文件的内容,供自动配置类使用。
没事就找找类,看看自动装配原理!
我们之后来进行一个单体项目的小项目测试,让大家能够快速上手开发!
附:搭建Spring Boot开发环境
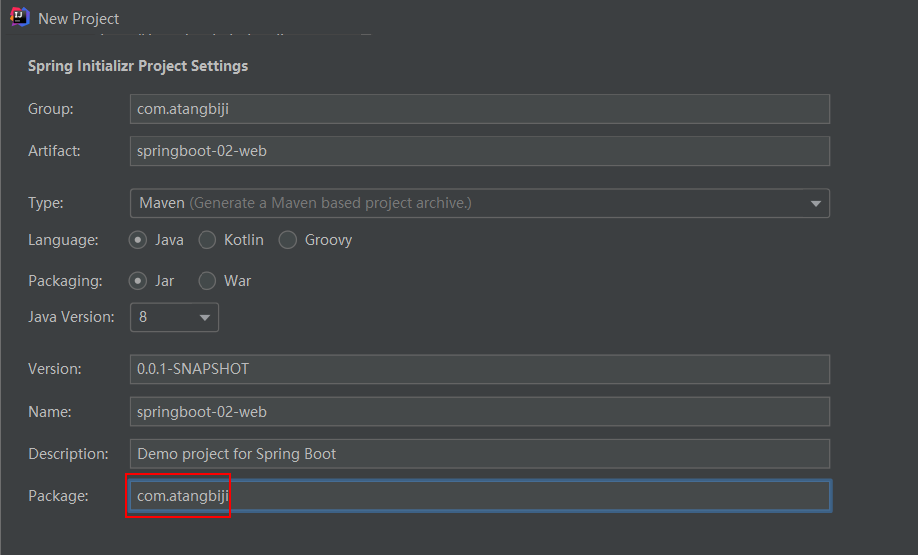
(1)在IDEA中新建一个项目名称为:springboot-02-web的Spring Initializr项目。项目信息如下图所示:
(2)选择初始化的组件(勾选Spring Web即可)和Spring Boot的版本(我们这里选择2.7.7版)。

(3)填写项目路径,等待项目构建成功。
(4)先删除IDEA自动生成的.mvn文件夹、.gitignore、HELP.md、mvnw、mvnw.cmd文件。
(5)然后,在Settings中手动配置Maven的安装目录、配置文件和本地仓库。
**注:**若Maven未识别到该子项目,则右键为其添加Maven支持。
(6)在程序的主启动类(Springboot02WebApplication)的同级目录下:
- 新建一个
controller包,用于存放控制器代码; - 新建一个
service包,用于存放业务层代码; - 新建一个
dao包,用于存放持久层代码(映射器接口及其对应的映射器配置文件); - 新建一个
pojo包,用于存放实体类; - 新建一个
utils包,用于存放我们封装的各种工具; - 新建一个
config包,用于存放自定义配置文件。
**注:**程序的主启动类一定要与controller、service、dao、pojo、utils、config包在同级目录下,否则识别不到【约定大于配置】。
(7)在controller包下新建一个HelloController类。
HelloController.java文件:
1 | package com.atangbiji.controller; |
(8)启动主启动类中的main函数,在浏览器中输入http://localhost:8080/hello,页面访问成功。访问结果如下图所示:

11、静态资源处理
11.1、传统web项目访问静态资源
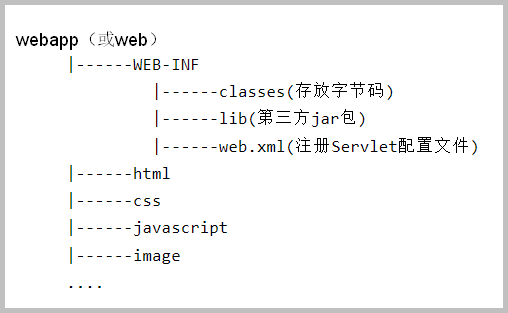
在传统的web项目开发中,我们都是将所有的前端页面放在项目的webapp(或web)目录下。如下图所示:
注:
- 放在
WEB-INF目录下的资源是受保护的,在浏览器上不能够通过路径直接访问。所以像HTML、CSS、JS、image等静态资源一定要放到WEB-INF目录之外。 - 传统
Web项目发布后,都会被放到Web服务器(Tomcat)中指定的web应用文件夹下(webapps目录)。(详见《Tomcat详解》)
11.2、Spring Boot项目访问静态资源
SpringBoot项目中对静态资源的存放位置,是有规定的!
在Spring Boot中,Spring MVC的web配置都在WebMvcAutoConfiguration这个自动配置类中。
(1)全局搜索WebMvcAutoConfiguration,可以发现:该类内部有一个WebMvcAutoConfigurationAdapter静态类。
(2)点击进入WebMvcAutoConfigurationAdapter类,可以发现其中有一个addResourceHandlers( 添加资源处理器)方法。
WebMvcAutoConfiguration.java文件:
1 |
|
分析上述函数可以发现:Spring Boot默认会通过以下三种方式访问静态资源。
11.2.1、方式一:直接访问Webjars包特定目录下的静态资源(了解)
11.2.1.1、什么是webjars ?
WebJars就是将客户端Web库(如jQuery、echarts、layui、Bootstrap等)打包后生成的一个个 jar(Java Archive)包。
Spring Boot源码在addResourceHandlers函数中将URL访问路径"/webjars/**"映射到了项目的"classpath:/META-INF/resources/webjars/"目录下。
这样,我们便可以通过URL访问到Webjars包"classpath:/META-INF/resources/webjars/"目录下的静态资源文件了。
因此,我们可以将静态资源存放在项目的"classpath:/META-INF/resources/webjars/"目录下。
注:我们一般不使用该方式访问我们自己编写的静态资源(如:HTML、CSS、JS、image等)。
11.2.1.2、访问示例
如:我们要访问并使用jQuery库,我们只需要:
(1)去WebJars官网查找jQuery库的Maven依赖,并将该依赖添加到Spring Boot项目的pom.xml文件中。
pom.xml文件:
1 | <!-- jQuery的WebJars依赖 --> |
(2)导入完毕后,查看webjars目录结构。如下图所示:
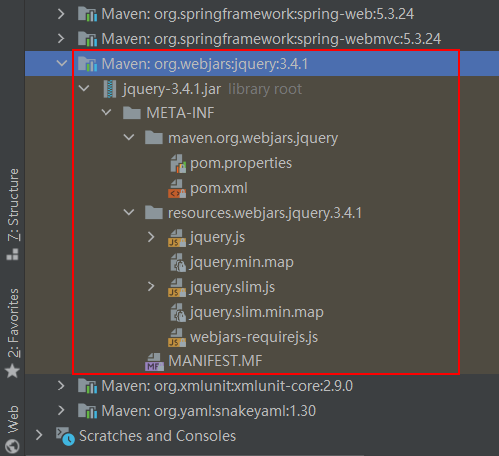
此时,我们便可以通过URL(http://localhost:8080/webjars/**)访问到Webjars包"classpath:/META-INF/resources/webjars/"目录下的静态资源了。
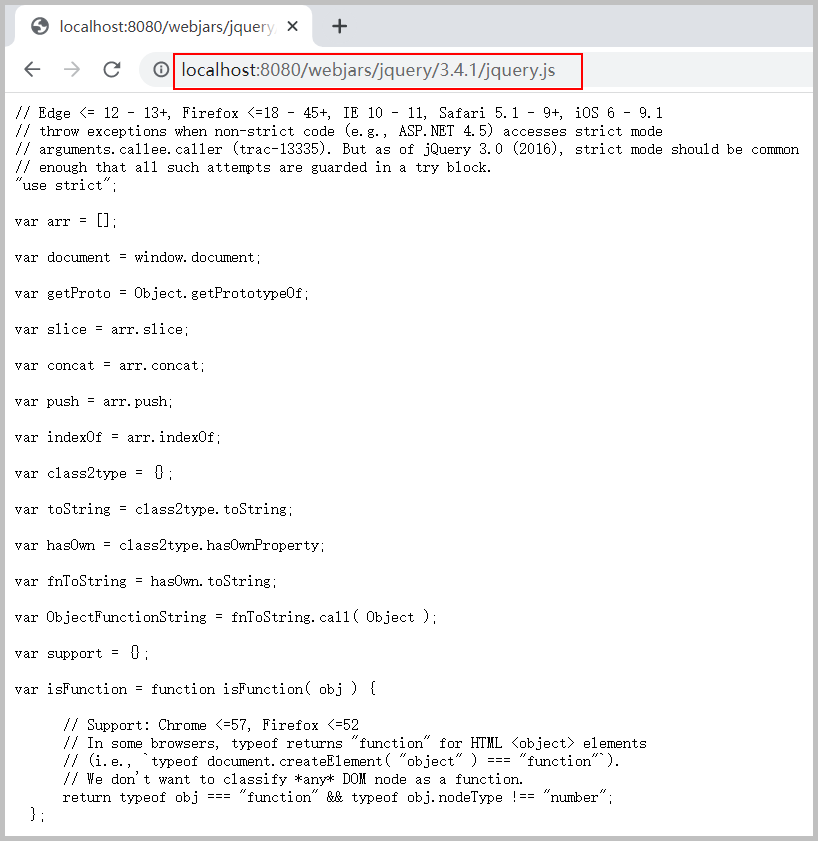
(3)启动主启动类中的main函数,在浏览器中输入http://localhost:8080/webjars/jquery/3.4.1/jquery.js,便可以成功访问jquery.js文件。访问结果如下图所示:
11.2.2、方式二:直接访问本地默认路径下的静态资源
11.2.2.1、源码分析
继续分析addResourceHandlers( 添加资源处理器)方法中的第二种静态资源映射规则,可以发现:其中调用了getStaticPathPattern方法用于获取静态资源的URL访问路径;调用了getStaticLocations方法用于获取静态资源的本地存放目录。
(1)点击进入getStaticPathPattern方法,可以发现静态资源的URL访问路径为:"/**"。
WebMvcProperties.java文件:
1 | //静态资源访问路径 |
(2)点击进入getStaticLocations方法,可以发现静态资源默认的本地存放目录为:"classpath:/META-INF/resources/", "classpath:/resources/", "classpath:/static/", "classpath:/public/"。
WebProperties.java文件:
1 | //静态资源默认的本地存放目录 |
即:Spring Boot源码在addResourceHandlers函数中将URL访问路径"/**"默认映射到了项目的"classpath:/META-INF/resources/", "classpath:/resources/", "classpath:/static/", "classpath:/public/"目录下。
这样,我们便可以通过URL访问项目默认目录下的静态资源文件了。
11.2.2.2、结论
- 我们可以将静态资源存放在项目的以下目录下:
1 | "classpath:/META-INF/resources/" |
- 访问上述四个目录的优先级为:
"classpath:/META-INF/resources/">"classpath:/resources/">"classpath:/static/">"classpath:/public/"。
我们在项目的resources根目录下新建对应的文件夹,都可以存放我们的静态文件。如:我们访问 http://localhost:8080/test.png , Spring Boot就会去默认的这些文件夹中寻找对应的静态资源test.png文件。
注:我们一般使用这种方式访问我们自己编写的静态资源(如:HTML、CSS、JS、image等)。
11.2.3、方式三:自定义静态资源存放路径(了解)
我们也可以在(properties或yaml)配置文件中自定义静态资源的URL访问路径和本地存放目录。如:
application.properties文件:
1 | #自定义静态资源的URL访问路径 |
注:
- 一旦自己定义了静态资源的访问路径或本地存放目录,
Spring Boot默认配置的访问路径或本地存放目录就会失效了! - 我们一般不自定义静态资源的访问路径和本地存放目录,而是使用默认的配置。
11.3、欢迎页定制
11.3.1、源码分析
Spring Boot的欢迎页同样是在WebMvcAutoConfiguration自动配置类中进行处理的。
(1)全局搜索WebMvcAutoConfiguration,可以发现:该类内部有一个EnableWebMvcConfiguration静态类。
(2)点击进入EnableWebMvcConfiguration类,可以发现其中有一个welcomePageHandlerMapping(欢迎页处理器映射)方法。
WebMvcAutoConfiguration.java文件:
1 |
|
分析welcomePageHandlerMapping(欢迎页处理器映射)方法,可以发现:其中调用了getWelcomePage方法用于获取欢迎页面。
(3)点击进入getWelcomePage方法。
WebMvcAutoConfiguration.java文件:
1 | //获取欢迎页面 |
可以发现:Spring Boot启动时默认会从默认的静态资源存放目录下搜索index.html页面作为欢迎页面。
11.3.2、具体实现
(1)在静态资源的任一默认存放目录下,新建一个index.html文件。
index.html文件:
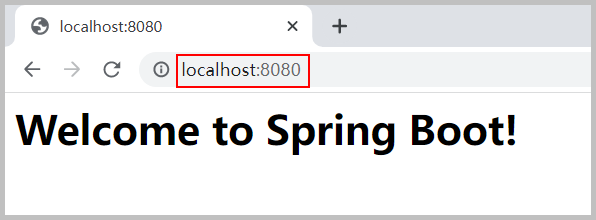
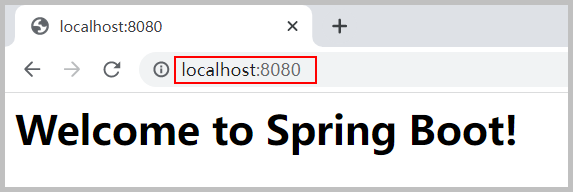
1 | <h1>Welcome to Spring Boot!</h1> |
(2)启动主启动类中的main函数,在浏览器中输入http://localhost:8080/,欢迎页面访问成功。访问结果如下图所示:
12、Thymeleaf模板引擎
12.1、模板引擎及其工作原理
前端交给我们的是html页面。在以前的项目开发中,我们需要把它们转成jsp页面,jsp的好处就是我们可以把查出一些数据转发到jsp页面,我们可以用jsp轻松实现数据的显示和交互等。
jsp的功能非常强大,包括能写Java代码等。但是由于SpringBoot项目是以jar包的方式进行打包(不是war包),且默认使用的是嵌入式的Tomcat,所以:SpringBoot默认是不支持jsp的。
既然SpringBoot不支持jsp,如果我们直接用纯静态页面的方式,那么会给我们的开发会带来很大的麻烦,那怎么办呢?
SpringBoot推荐我们使用模板引擎。
**注:**其实jsp就是一个模板引擎。
模板引擎有非常多,如:SpringBoot给我们推荐的Thymeleaf,还有用的比较多的freemarker等。但再多的模板引擎,它们的思想都是一样的,其工作原理如下图所示:
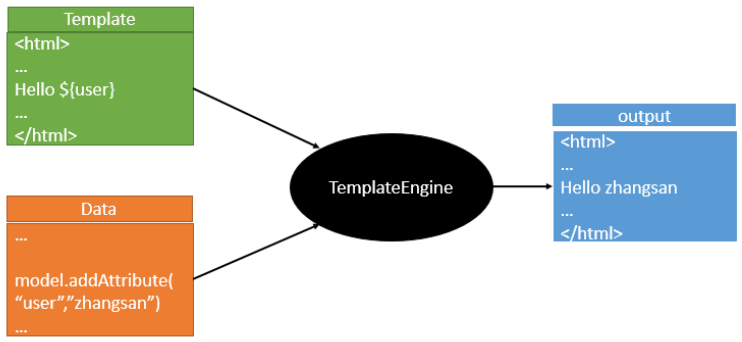
模板引擎的工作原理就是:将后端封装好的数据填充到前端写好的页面模板的表达式中,最终生成一个我们想要的前端页面。
- 不管是
jsp,还是其他模板引擎,都是这个思想。 - 不同的模板引擎之间,只是在语法上有所不同。
12.2、Thymeleaf简介
Thymeleaf是一个面向web和非web环境的现代服务器端Java模板引擎。它是一个开源的Java库,能够处理html、xml、text、javascript、css、raw等模型。
Thymeleaf提供了一个用于整合Spring MVC的可选模块,在项目开发中,我们可以使用Thymeleaf来完全代替jsp,或其他模板引擎,如Velocity、FreeMarker等。
Thymeleaf官网:https://www.thymeleaf.org/Thymeleaf在Github上的主页:https://github.com/thymeleaf/thymeleaf
12.3、Thymeleaf自动配置规则
12.3.1、源码分析
根据Spring Boot的自动配置原理,我们可以:
-
在自动配置的核心文件中找到
Thymeleaf的自动配置类(org.springframework.boot.autoconfigure.thymeleaf.ThymeleafAutoConfiguration)。 -
全局搜索
ThymeleafAutoConfiguration自动配置类。ThymeleafAutoConfiguration.java文件:1
2
3
4
5
6
7
8
9
10
11//表示这是一个自动配置类,和以前Spring中编写的xml配置文件一样,也可以向IOC容器中添加组件
//启动指定类的属性配置功能(参数:xxxProperties类为属性配置类)
//自动配置类生效的条件
public class ThymeleafAutoConfiguration {
……
} -
点击进入
Thymeleaf的属性配置类(ThymeleafProperties),我们可以在其中查看Spring Boot中Thymeleaf默认的自动配置规则。ThymeleafProperties.java文件:1
2
3
4
5
6
7
8
9
10
11
12
13
14
15
public class ThymeleafProperties {
private static final Charset DEFAULT_ENCODING = StandardCharsets.UTF_8;
//默认前缀
public static final String DEFAULT_PREFIX = "classpath:/templates/";
//默认后缀
public static final String DEFAULT_SUFFIX = ".html";
private boolean checkTemplate = true;
private boolean checkTemplateLocation = true;
private String prefix = DEFAULT_PREFIX;
private String suffix = DEFAULT_SUFFIX;
private String mode = "HTML";
private Charset encoding = DEFAULT_ENCODING;
……
}
12.3.1、结论
通过分析上述源码,我们可以在发现Spring Boot中Thymeleaf默认的前缀为:"classpath:/templates/",默认的后缀为:".html"。
因此,**使用Thymeleaf我们什么都不需要配置,只需要把我们的html页面存放在类路径下的templates目录下即可。**这样,Thymeleaf就可以帮助我们自动渲染前端页面了。
12.4、Thymeleaf的使用步骤
(1)添加Thymeleaf启动器依赖
在Spring官方文档中:找到Thymeleaf启动器,并将其依赖添加到项目的pom.xml文件中。
pom.xml文件:
1 | <!--thymeleaf依赖--> |
此时,Maven会自动下载相应的jar包,如下图所示:

(2)新建html页面并导入约束
在项目的templates目录下新建一个test.html测试页面。
test.html文件:
1 |
|
注:
-
templates目录下的所有页面,只能通过Controller来跳转! -
我们要使用
Thymeleaf,需要在html文件中导入命名空间的约束,方便提示。1
xmlns:th="http://www.thymeleaf.org"
-
如果
html页面中的表达式变量名爆红,那么我们可以在设置中取消Thymeleaf的表达式变量验证。

(3)编写控制器
在项目的Controller目录下新建一个TestController类。
TestController.java文件:
1 | package com.atangbiji.controller; |
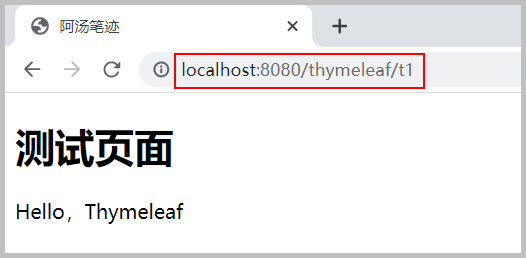
(4)启动测试
启动主启动类中的main函数,在浏览器中输入http://localhost:8080/thymeleaf/t1,页面访问成功。访问结果如下图所示:
12.5、Thymeleaf语法
12.5.1、属性优先级
我们可以使用任意的th:xxx来替换html中原生属性的值。Thymeleaf中可以使用的(全部)属性及优先级如下表所示:

12.5.2、表达式语法
(1)简单表达式
| 表达式名字 | 语法格式 | 用途 |
|---|---|---|
变量表达式(Variable Expressions) |
${…} | 获取变量的值 |
选择变量表达式(Selection Variable Expressions) |
*{…} | 获取上下文变量的值,与${}功能类似 |
消息表达式(Message Expressions) |
#{…} | 获取国际化信息 |
链接表达式(Link URL Expressions) |
@{…} | 定义URL |
代码块表达式(Fragment Expressions) |
~{…} | 引用公共页面代码块 |
(2)字面常量
- 文本值(单引号):
'one text'、'Another one!'、… - 数字:
0、34、3.0、12.3、… - 布尔值:
true,false - 空值:
null - 变量:
one、sometext、main、…
(3)文本操作
- 字符串拼接:
+ - 文本替换:
|The name is ${name}|
(4)数学运算
+、-、*、/、%
(5)布尔运算
and、or、!(not)
(6)比较运算
>、<、>=、<=、==、!=
(7)条件运算
-
If-then:
(if) ? (then) -
If-then-else:
(if) ? (then) : (else) -
Default:
(value) ?: (defaultvalue)
(8)无操作:_
注:
- 上述表达式中的所有功能都可以进行组合和嵌套。
Thymeleaf中有很多样式,实际项目中需要使用什么,能够根据官方文档来查询才是最重要的,要熟练使用官方文档!
13、Spring MVC自动配置原理
13.1、Spring Boot MVC的默认配置
Spring Boot为Spring MVC提供了自动配置,它可以很好地与大多数应用程序一起工作。Spring Boot中自动配置的Spring MVC主要是在Spring默认设置的基础上添加了以下功能:(详见Spring Boot官方文档)
(1)包含视图解析器( ContentNegotiatingViewResolver 和 BeanNameViewResolver )。
-
我们之前学习
SpringMVC时需要手动配置视图解析器,而Spring Boot为我们自动配置了自动配置了视图解析器(ContentNegotiatingViewResolver和BeanNameViewResolver)。 -
ContentNegotiatingViewResolver(内容协商视图解析器)主要用来组合所有的视图解析器,它能够根据Web请求帮我们从候选视图解析器中选择最佳的视图解析器。 -
视图解析器根据方法的返回值取得视图对象(
View),然后由视图对象决定如何渲染(转发、重定向)。
(2)支持静态资源处理,以及webjars。(详见第11节《静态资源处理》)
(3)自动注册了很多转换器(Converter)、通用转换器(GenericConverter)和格式化器(Formatter)。
-
转换器(
Converter):主要用于把前端提交的数据自动转换成后台封装的对象。如:- 把
"1"字符串自动转换为int类型; - 把前端提交的用户信息(字段)转换为
User实体类。
- 把
-
格式化器(
Formatter):可以对日期格式的数据进行格式化,并封装成Date对象。
**(4)支持 HttpMessageConverters。**即支持Http请求和响应的转换,如:把一个User对象转换为JSON字符串。
(5)自动注册了错误消息解析器(MessageCodesResolver)。
(6)支持自定义首页(index.html)。
(7)自动使用初始化数据绑定器(ConfigurableWebBindingInitializer)。帮助我们把请求数据绑定到JavaBean。
注:Spring Boot中这么多的自动配置,原理都是一样的,我们要不断提升自己通过分析源码得出结论的能力。
13.2、增强Spring Boot MVC的默认配置
如果我们要在上述Spring Boot MVC默认功能的基础上增加其它MVC配置(拦截器、格式化程序、视图控制器以及其它功能),那么我们可以自定义一个类型为WebMvcConfigurer的配置类(即WebMvcConfigurer接口实现类),然后在该类上添加@configuration注解,并且不能再该类上添加@EnableWebMvc注解。
13.2.1、实现步骤
在上述项目的基础上:
(1)在程序的主启动类的同级目录下,新建一个config包,用于存放自定义配置文件。
(2)在config包下新建一个名称为MyMvcConfig的WebMvcConfigurer接口实现类,并为它添加@configuration注解,将其定义成一个配置类。并在其中重写addInterceptors方法以实现视图跳转功能。
MyMvcConfig.java文件:
1 | package com.atangbiji.config; |
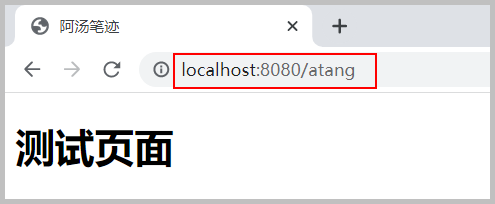
(3)运行主启动类中的main函数,在浏览器中输入http://localhost:8080/test,页面跳转成功。访问结果如下图所示:
13.2.2、源码分析
WebMvcAutoConfiguration是SpringMVC的自动配置类。
(1)全局搜索WebMvcAutoConfiguration自动配置类。可以发现其内部有一个WebMvcAutoConfigurationAdapter静态内部类,该类在做其它自动配置时会导入通过@Import注解导入EnableWebMvcConfiguration类。
WebMvcAutoConfiguration.java文件:
1 |
|
(2)点击进入EnableWebMvcConfiguration类,可以发现它继承了一个DelegatingWebMvcConfiguration父类。
(3)点击进入DelegatingWebMvcConfiguration类,可以发现它会从容器中获取所有的webMvcConfigurer。
DelegatingWebMvcConfiguration.java文件:
1 |
|
(4)我们可以在该类中去寻找一个我们刚才设置的viewController作为参考,发现它调用了一个addViewControllers方法。
DelegatingWebMvcConfiguration.java文件:
1 |
|
(5)点击进入addViewControllers方法。可以发现:它将所有与WebMvcConfigurer相关的配置一起调用!包括我们自己配置的和Spring给我们配置的。
WebMvcConfigurerComposite.java文件:
1 |
|
因此,我们可以得出**结论:**所有的WebMvcConfiguration都会被作用,不止Spring自己的配置类,我们自定义的配置类也会被调用。
注:
-
在
Spring Boot中会有非常多的增强配置类,我们应该多留心注意。 -
如果我们希望在
Spring Boot MVC默认功能的基础上使用自定义的RequestMappingHandlerMapping、RequestMappingHandlerAdapter或ExceptionHandlerExceptionResolver的组件,那么我们可以声明一个WebMvcRegistrationAdapter实例来提供这些组件的自定义实例。
13.3、全面接管Spring MVC(了解)
如果我们要全面接管Spring MVC,那么只需在上述自定义的MVC配置类中添加一个@EnableWebMvc注解即可。
此时,Spring Boot中所有的Spring MVC自动配置都会失效!因此,实际开发中,我们不推荐全面接管SpringMVC。
13.3.1、对比测试
在上述项目的基础上:
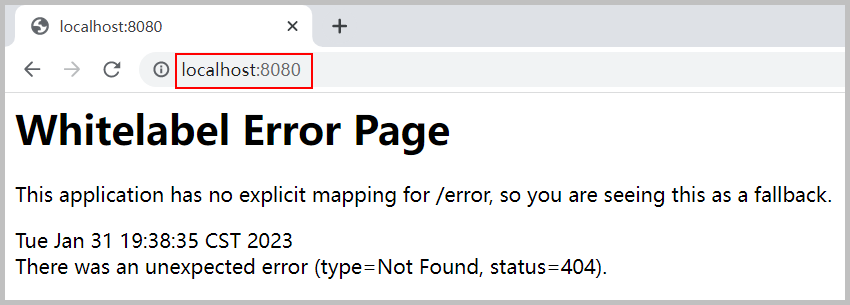
(1)不加@EnableWebMvc注解之前
运行主启动类中的main函数,在浏览器中输入http://localhost:8080/,访问首页成功。访问结果如下图所示:
(2)添加@EnableWebMvc注解之后
MyMvcConfig.java文件:
1 | package com.atangbiji.config; |
重新运行主启动类中的main函数,在浏览器中输入http://localhost:8080/,访问首页失败。因为,自定义的WebMvcConfigurer配置类全面接管Spring MVC后,SpringBoot默认给我们配置的静态资源映射会全部无效。访问结果如下图所示:
13.3.2、源码分析
(1)点击进入@EnableWebMvc注解,可以发现:它通过@Import注解导入了一个DelegatingWebMvcConfiguration类。
EnableWebMvc.java文件:
1 |
|
(2)点击进入DelegatingWebMvcConfiguration类,发现它继承了一个WebMvcConfigurationSupport父类。
DelegatingWebMvcConfiguration.java文件:
1 |
|
(3)查看WebMvcAutoConfiguration自动配置类。可以发现:当容器中没有WebMvcConfigurationSupport这个组件(Bean)时,这个自动配置类才生效。
WebMvcAutoConfiguration.java文件:
1 |
|
因此,当我们在上述自定义的MVC配置类中添加了@EnableWebMvc注解后,Spring Boot中所有的Spring MVC自动配置都会失效!
14、使用JDBC操作数据库
14.1、Spring Data简介
Spring Data也是Spring中与Spring Boot、Spring Cloud等齐名的知名项目。对于数据访问层,无论是SQL(关系型数据库)还是NOSQL(非关系型数据库),Spring Boot底层都是采用Spring Data的方式进行统一处理。
-
Spring Data官网:https://spring.io/projects/spring-data -
数据库相关的启动器为:
spring-boot-starter-data-xxx,具体参见官方文档:https://docs.spring.io/spring-boot/docs/2.7.7/reference/htmlsingle/#using.build-systems.starters
14.2、搭建测试环境
(1)新建一个项目名称为:springboot-03-data 的Spring Initializr项目。参见《使用IDEA创建项目》
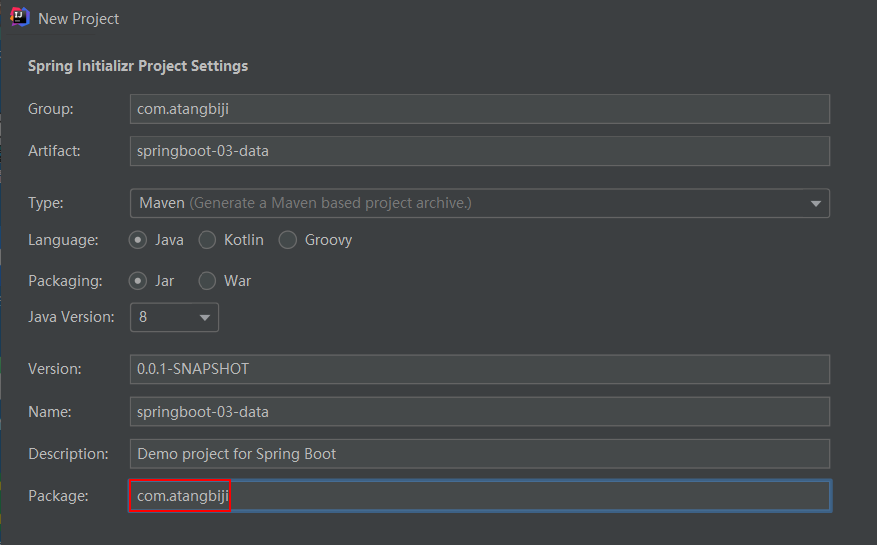
(2)选择初始化的组件(此处勾选JDBC API、MySQL Driver即可)和Spring Boot的版本(我们这里选择2.7.8版)。
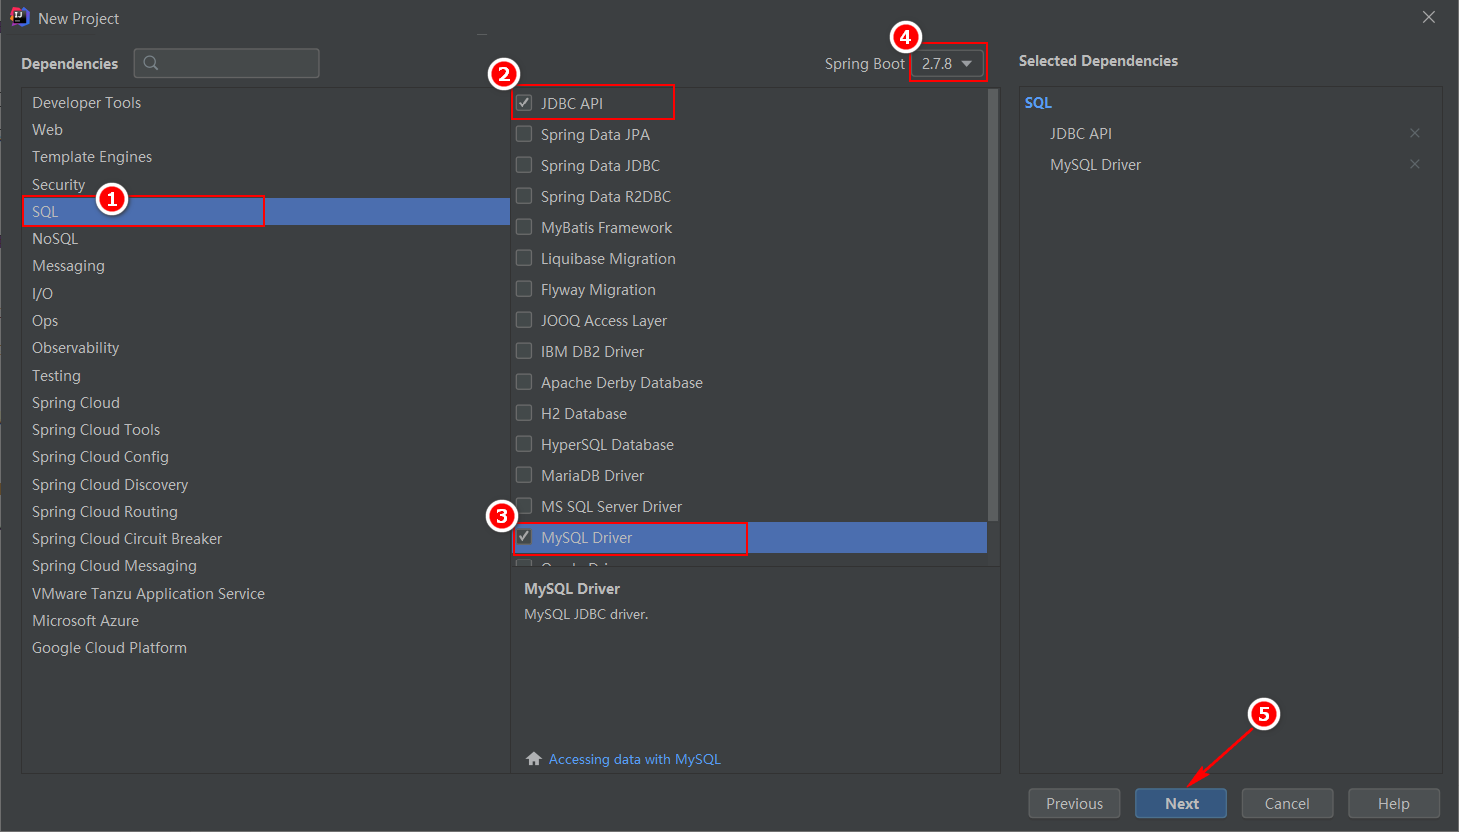
(3)填写项目路径,等待项目构建成功。项目构建成功后,它会默认为我们导入JDBC启动器和MySQL驱动相关的依赖。
pom.xml文件:
1 | <!-- JDBC启动器 --> |
(4)先删除IDEA自动生成的.mvn文件夹、.gitignore、HELP.md、mvnw、mvnw.cmd文件。
(5)然后,在Settings中手动配置Maven的安装目录、配置文件和本地仓库。
**注:**若Maven未识别到该子项目,则右键为其添加Maven支持。
(6)在程序的主启动类(Springboot03DataApplication)的同级目录下:
- 新建一个
controller包,用于存放控制器代码; - 新建一个
service包,用于存放业务层代码; - 新建一个
dao包,用于存放持久层代码(映射器接口及其对应的映射器配置文件); - 新建一个
pojo包,用于存放实体类; - 新建一个
utils包,用于存放我们封装的各种工具; - 新建一个
config包,用于存放自定义配置文件。
**注:**程序的主启动类一定要与controller、service、dao、pojo、utils、config包在同级目录下,否则识别不到【约定大于配置】。
(7)在resources目录下,新建一个application.yaml配置文件,并在其中配置数据库连接信息。
application.yaml文件:
1 | spring: |
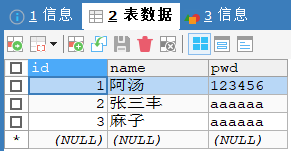
**注:**我们这里连接的是在学习MyBatis时创建的mybatis数据库。其中的user表如下图所示:
14.3、查看Spring Boot默认配置的数据源
按上述步骤完成测试环境搭建后,Spring Boot默认会帮我们完成JDBC相关的自动配置,我们直接去使用即可。
接下来,我们在测试类中对使用的数据源进行测试。
(1)编写测试函数。
Springboot03DataApplicationTests.java文件:
1 | package com.atangbiji; |
(2)启动测试类(Springboot03DataApplicationTests),输出结果如下图所示:

结论:Spring Boot默认给我们配置的数据源为 : Hikari数据源(class com.zaxxer.hikari.HikariDataSource)。
注:
HikariDataSource号称是Java WEB当前速度最快的数据源,相比于传统的C3P0、DBCP、Tomcat jdbc等连接池更加优秀。Spring Boot 2.0以上版本默认使用的是Hikari数据源。- 而以前版本(如
Spring Boot 1.5)默认使用org.apache.tomcat.jdbc.pool.DataSource作为数据源。 - 我们可以通过配置
spring.datasource.type属性的值来指定其它的数据源,该属性的值为将要使用的数据源(数据库连接池)的完全限定名。
附:源码分析
Spring Boot中,JDBC数据源的自动配置是在org.springframework.boot.autoconfigure.jdbc.DataSourceAutoConfiguration这个自动配置类中完成的,与之对应的属性配置类是DataSourceProperties。具体分析过程参见《Spring Boot自动配置原理》
14.4、JDBCTemplate模板类
-
有了数据源(
com.zaxxer.hikari.HikariDataSource),然后我们就可以拿到数据库连接(java.sql.Connection);有了数据库连接,然后我们就可以使用原生的JDBC语句来操作数据库(CRUD)了。 -
即使不使用第三方第数据库操作框架(如:
MyBatis等),Spring本身也对原生的JDBC做了轻量级的封装,即JdbcTemplate类。
**注:**在Spring Boot中有很多的XxxTemplate类。XxxTemplate类是Spring Boot已经为我们封装好的模板类(Bean),我们只需要拿来使用即可。
-
JDBC操作数据库的所有CRUD方法都被封装在JdbcTemplate这一模板类中。 -
Spring Boot默认已经将配置好的JdbcTemplate放在了容器中,我们只需自己注入即可使用。 -
JdbcTemplate的自动配置是依赖org.springframework.boot.autoconfigure.jdbc包下的JdbcTemplateConfiguration这一自动配置类完成的。
JdbcTemplate类主要提供以下几类方法:
execute方法:可以用于执行任何SQL语句,一般用于执行DDL语句。update方法及batchUpdate方法:update方法:用于执行新增、修改、删除等语句。batchUpdate方法:用于执行批处理相关语句。
query方法及queryForXXX方法:用于执行查询相关语句。call方法:用于执行存储过程、函数相关语句。
附:源码分析
Spring Boot中,JdbcTemplate的自动配置是在org.springframework.boot.autoconfigure.jdbc包下的JdbcTemplateAutoConfiguration这一自动配置类完成的,与之对应的属性配置类是JdbcProperties。具体分析过程参见《Spring Boot自动配置原理》
(1)全局搜索JdbcTemplateAutoConfiguration类。
JdbcTemplateAutoConfiguration.java文件:
1 |
|
(2)点击进入JdbcTemplateConfiguration类,可以发现:在其中配置了JdbcTemplate类。
1 |
|
14.5、CRUD测试
(1)在pom.xml文件中导入web场景启动器。
pom.xml文件:
1 | <!-- web场景启动器 --> |
(2)在controller包下,新建一个JdbcController类,用于测试使用JDBC操作数据库。
JdbcController文件:
1 | package com.atangbiji.controller; |
(3)启动主启动类(Springboot03DataApplication)中的main函数。
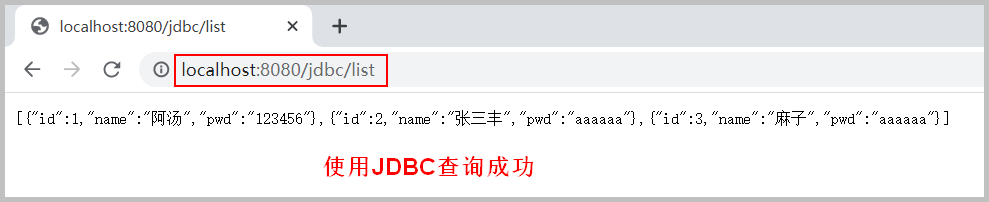
- 在浏览器中输入
http://localhost:8080/jdbc/list,数据库查询成功。访问结果如下图所示:
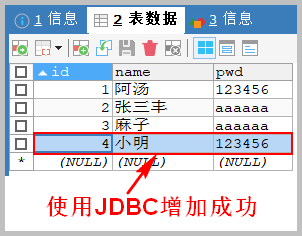
- 在浏览器中输入
http://localhost:8080/jdbc/add,数据增加成功。此时,数据库中的user表如下图所示:
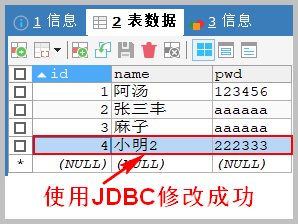
- 在浏览器中输入
http://localhost:8080/jdbc/update/4,数据修改成功。此时,数据库中的user表如下图所示:
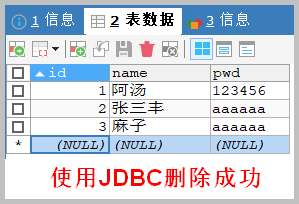
- 在浏览器中输入
http://localhost:8080/jdbc/delete/4,数据删除成功。此时,数据库中的user表如下图所示:
至此,在Spring Boot中使用JDBC就搞定了数据库的CRUD。
15、整合Druid数据源
15.1、Druid简介
为了提高Java程序操作数据库时候的性能,我们不得不使用数据库连接池。
Druid是阿里巴巴开源平台上的一个数据库连接池实现。它结合了C3P0、DBCP等DB连接池的优点,同时加入了日志监控。
Druid可以很好的监控DB池连接和SQL的执行情况,它天生就是针对监控而生的DB连接池。
Druid已经在阿里巴巴部署了超过600个应用,经过一年多生产环境大规模部署的严苛考验。
Spring Boot 2.0以上版本默认使用的是Hikari数据源。可以说Hikari与Driud都是当前Java Web开发中最优秀的数据源。我们这里重点介绍Spring Boot如何集成Druid数据源,如何实现数据库监控。
Github地址:https://github.com/alibaba/druid/
15.2、DruidDataSource基本配置参数
com.alibaba.druid.pool.DruidDataSource可以设置的基本配置参数如下:

15.3、配置DruidDataSource
在上述项目的基础上:
(1)在项目的pom.xml文件中添加上Druid数据源的依赖。
pom.xml文件:
1 | <!-- Druid数据源依赖 --> |
(2)在配置文件中切换数据源。Spring Boot 2.0以上版本默认使用com.zaxxer.hikari.HikariDataSource数据源,如果我们不想使用默认的数据源,想切换数据源,那么只需要通过配置spring.datasource.type属性的值来指定其它的数据源即可。
application.yaml文件:
1 | spring: |
(3)数据源切换之后,在测试类中注入DataSource,然后获取到它。输出当前使用的数据源便知是否成功切换。
Springboot03DataApplicationTests.java文件:
1 | package com.atangbiji; |
(4)启动测试类(Springboot03DataApplicationTests),发现当前使用的数据源已经切换成DruidDataSource。输出结果如下图所示:

(5)数据源切换成功后,就可以设置druid数据源的专有属性了。如:数据源连接初始化大小、最大连接数、等待时间、最小连接数等。
application.yaml文件:
1 | spring: |
(6)导入Log4j的依赖。
pom.xml文件:
1 | <!-- log4j依赖 --> |
(7)在程序的主启动类(Springboot03DataApplication)的同级目录下,新建一个config包,用于存放自定义配置文件。
(8)在config包下新建一个DruidConfig配置类,用于配置Druid数据源。并在其中将自定义的Druid数据源添加到容器中,不再使用Spring Boot自动创建的数据源,即:将全局配置文件(application.yaml)中的Druid数据源属性与com.alibaba.druid.pool.DruidDataSource绑定,进而让全局配置文件中的Druid数据源属性生效。
DruidConfig.java文件:
1 | package com.atangbiji.config; |
其中:@ConfigurationProperties(prefix = "spring.datasource")的作用就是:将全局配置文件中前缀为spring.datasource的属性值注入到com.alibaba.druid.pool.DruidDataSource的同名参数中去。
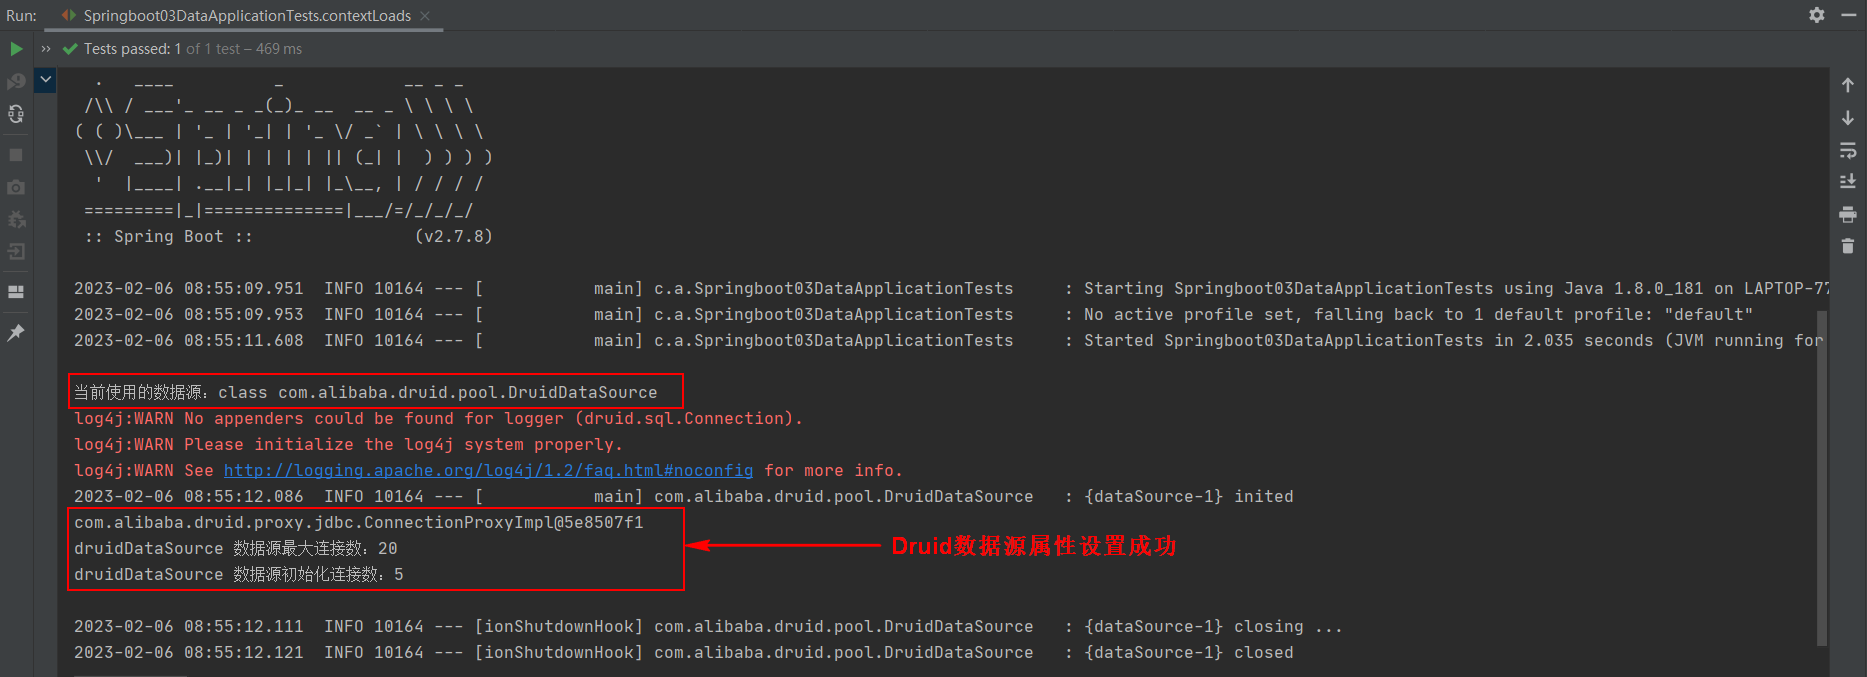
(9)在测试类中测试Druid数据源的属性是否设置成功。
Springboot03DataApplicationTests.java文件:
1 | package com.atangbiji; |
(10)启动测试类(Springboot03DataApplicationTests),可见发现配置参数已经生效!输出结果如下图所示:
15.4、配置Druid数据源监控
Druid数据源具有监控的功能,并提供了一个web界面方便用户查看。类似安装路由器时,厂家提供了一个默认的web页面。具体使用步骤如下:
(1)在Druid数据源的配置类中设置Druid的后台管理页面,如:登录账号、密码等。
DruidConfig.java文件:
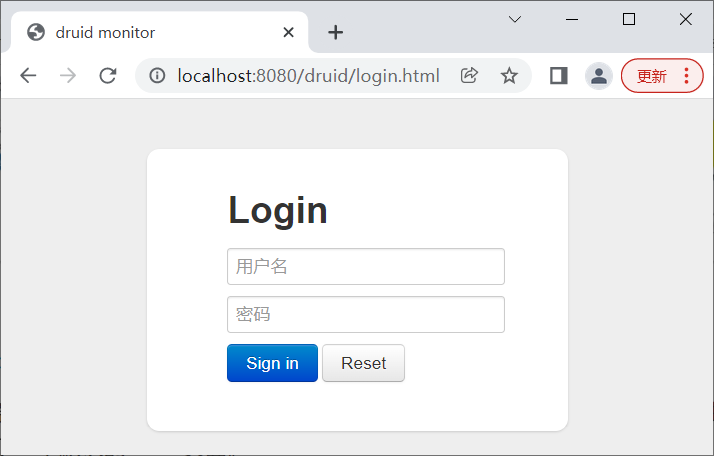
1 | /** |
(2)配置完毕后,重新启动主启动类(Springboot03DataApplication)中的main函数。在浏览器中输入http://localhost:8080/druid/,系统会自动跳转到登录页面。如下图所示:
(3)在Druid数据源监控登录界面输入自定义的用户名和密码,即可成功登录Druid监控管理后台。访问结果如下图所示:

15.5、配置Druid web监控过滤器
我们还可以在Druid数据源的配置类中配置web监控的过滤器(filter)。具体实现方法如下:
DruidConfig.java文件:
1 | /** |
在工作中,我们按需求进行配置即可!
16、整合MyBatis框架
16.1、mybatis-spring-boot-starter
- 官方文档:http://mybatis.org/spring-boot-starter/mybatis-spring-boot-autoconfigure/
Maven仓库地址:https://mvnrepository.com/artifact/org.mybatis.spring.boot/mybatis-spring-boot-starter
16.2、搭建测试环境
(1)新建一个项目名称为:springboot-04-mybatis 的Spring Initializr项目。参见《使用IDEA创建项目》
(2)选择初始化的组件(此处勾选Spring Web、JDBC API、MySQL Driver即可)和Spring Boot的版本(我们这里选择2.7.8版)。
(3)填写项目路径,等待项目构建成功。项目构建成功后,它会默认为我们导入web启动器、JDBC启动器和MySQL驱动相关的依赖。
pom.xml文件:
1 | <!-- web启动器 --> |
(4)先删除IDEA自动生成的.mvn文件夹、.gitignore、HELP.md、mvnw、mvnw.cmd文件。
(5)然后,在Settings中手动配置Maven的安装目录、配置文件和本地仓库。
**注:**若Maven未识别到该子项目,则右键为其添加Maven支持。
(6)在程序的主启动类(Springboot03DataApplication)的同级目录下:
- 新建一个
controller包,用于存放控制器代码; - 新建一个
service包,用于存放业务层代码; - 新建一个
dao包,用于存放持久层代码(映射器接口及其对应的映射器配置文件); - 新建一个
pojo包,用于存放实体类; - 新建一个
utils包,用于存放我们封装的各种工具; - 新建一个
config包,用于存放自定义配置文件。
**注:**程序的主启动类一定要与controller、service、dao、pojo、utils、config包在同级目录下,否则识别不到【约定大于配置】。
16.3、整合步骤
16.3.1、导入MyBatis启动器
(1)在项目的pom.xml文件中导入MyBatis启动器。
pom.xml文件:
1 | <!-- mybatis启动器 --> |
16.3.2、配置数据源
(2)在resources目录下,新建一个application.yaml配置文件,并在其中配置数据库连接信息。
application.yaml文件:
1 | #配置数据源 |
注:
-
我们这里使用的是Spring Boot默认的
Hikari数据源。 -
我们这里连接的是在学习
MyBatis时创建的mybatis数据库。其中的user表如下图所示:
(3)在测试类中测试数据库是否连接成功。
Springboot04MybatisApplicationTests.java文件:
1 | package com.atangbiji; |
(4)启动测试类(Springboot04MybatisApplicationTests),数据库连接成功。输出结果如下图所示:

16.3.3、创建实体类
(5)在项目的pom.xml文件中导入Lombok依赖。
pom.xml文件:
1 | <!--lombok依赖--> |
(6)在项目的pojo包下新建一个User类,用于实现关系型数据库和业务实体间的映射。
User.java文件:
1 | package com.atangbiji.pojo; |
16.3.4、创建映射器接口
(7)在项目的dao包下新建一个UserMapper映射器接口类,然后再向其中添加映射器接口函数。
UserMapper.java文件:
1 | package com.atangbiji.dao; |
注:
- 映射器接口中的接口函数用于映射
XML映射器配置文件中对应标签中的SQL语句。 @Mapper注解表示该类是一个MyBatis的映射器接口类。@Repository注解是@Component注解的衍生注解,用于将dao层的实体类对应的bean对象装配到Spring IOC容器中,交由Spring管理。
16.3.5、创建XML映射器配置文件
(8)在项目的resources目录下新建一个mybatis.mapper目录,用于存放XML映射器配置文件。然后,在该目录下新建一个映射器配置文件UserMapper.xml,并在其中使用标签实现SQL语句与映射器接口函数的映射。
UserMapper.xml文件:
1 |
|
16.3.6、配置MyBatis(重点)
(9)在全局配置文件(application.properties或application.yaml)中配置MyBatis的属性。(重点)
application.yaml文件:
1 | #整合MyBatis |
注:Spring Boot中导入MyBatis启动器后,MyBatis的相应配置会在自动配置类(MybatisAutoConfiguration)中自动配置,其对应的属性配置类为MybatisProperties类。因此,Spring Boot中我们一般不再使用MyBatis核心配置文件,而是将以前MyBatis核心配置文件中的所有配置改在Spring Boot的全局配置文件(application.properties或application.yaml)中配置了。
16.3.7、CRUD测试
(10)在controller包下新建一个UserController类,用于测试Spring Boot整合MyBatis后的增删改查功能测试。
UserController.java文件:
1 | package com.atangbiji.controller; |
**注:**实际项目中建议在Service层调用Dao层。
(11)启动主启动类(Springboot04MybatisApplication)中的main函数。
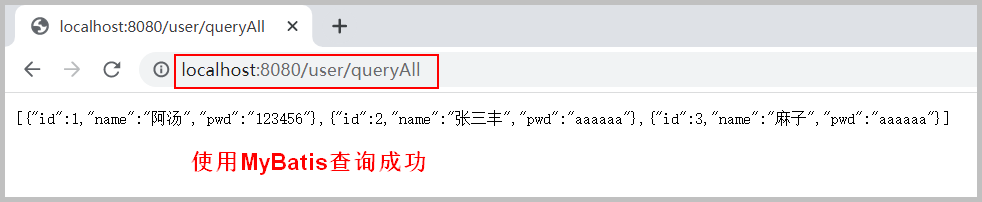
- 在浏览器中输入
http://localhost:8080/user/queryAll,数据库查询成功。访问结果如下图所示:
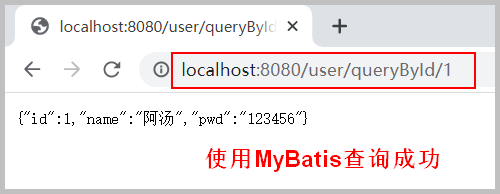
- 在浏览器中输入
http://localhost:8080/user/queryById/1,数据库查询成功。访问结果如下图所示:
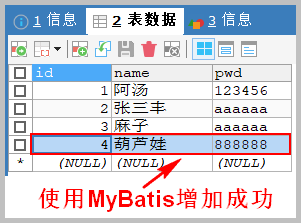
- 在浏览器中输入
http://localhost:8080/user/add,数据增加成功。此时,数据库中的user表如下图所示:
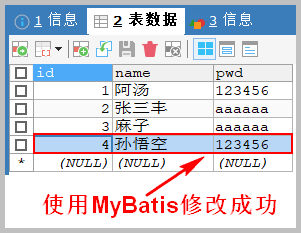
- 在浏览器中输入
http://localhost:8080/user/update,数据修改成功。此时,数据库中的user表如下图所示:
- 在浏览器中输入
http://localhost:8080/user/delete/4,数据删除成功。此时,数据库中的user表如下图所示:

17、项目实战
学完上述知识点后,我们就可以使用Spring Boot进行基本的Web项目开发了!这里不再赘述,多练习才是王道!
(持续更新中…… )

关注**“阿汤笔迹”** 微信公众号,获取更多学习笔记。
原文地址:http://www.atangbiji.com/2023/02/12/SpringBootInDetail02WebDev
博主最新文章在个人博客 http://www.atangbiji.com/ 发布。